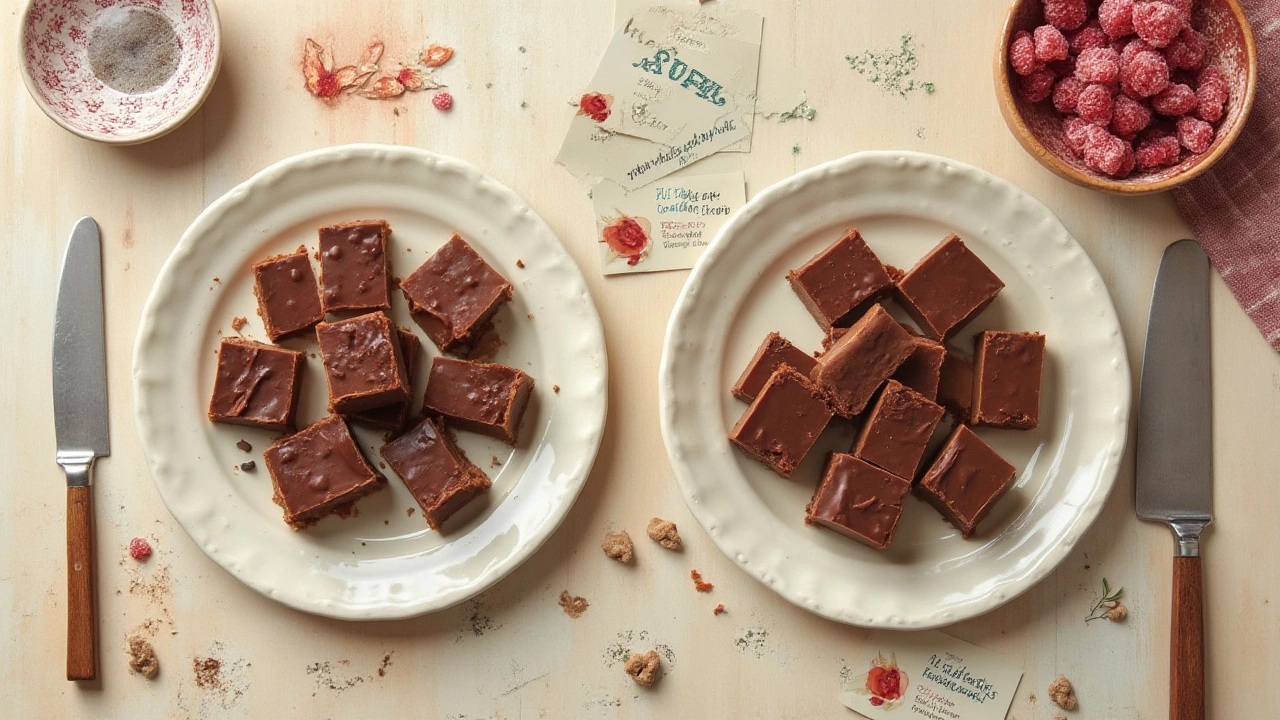
Cracking open a batch of homemade fudge should feel like magic. But sometimes? That glossy, dreamy slab just… doesn't happen. Instead, you're left staring at a sugary soup in a pan, disappointed and wondering what went sideways. If your spoon sinks where it should slice, you’re not alone. More people fumble fudge than you’d think, and the reasons why are way more interesting than you might suspect. This isn’t just a "beginner’s mistake." Even folks with years of baking under their belts get surprised by fudge that flat-out refuses to harden.
Common Reasons Homemade Fudge Stays Soft
Ever stood by the stove, stirring nervously, hoping everything is going to turn out perfect? Real talk: fudge is one of those old-school treats that’s both simple and finicky. The tiniest misstep can hijack your batch. When homemade fudge isn’t hardening like it should, usually one of these trouble spots is to blame:
- Sugar syrup temperature: This beast is the #1 culprit. Classic fudge is all about heating the sugar mixture to the right temperature, usually between 234°F and 238°F (soft-ball stage). If you undercook it—even by a few degrees—your fudge won’t set. Go over, and you risk making a brick instead.
- Incorrect sugar-to-liquid ratio: Too much liquid (like milk or cream) and you’ll get a runny finish. The classic fudge formula does not forgive off-the-cuff changes. Even just a tablespoon or two of extra liquid can leave you with fudge that never fully firms up.
- Timing of mixing: Right after the mixture hits the target temp, beating the fudge is crucial. If you try to stir too soon or too late, the texture is off—sometimes too soft, sometimes gritty.
- Humidity and weather: Believe it or not, a rainy or extra-humid day can mess with your candy making. Fudge pulls moisture from the air, and this can stop it from properly setting.
- Shortcuts (like microwaving) or using substitutions: Cream, butter, condensed milk—these all have roles in getting your fudge to harden. Low-fat swaps or using alternate kinds of sugar can change the chemistry and result in a soft, sticky batch.
There’s a reason why every old cookbook or chemistry nerd swears by using a candy thermometer for fudge. Even one degree of difference matters. A 2023 survey from America’s Test Kitchen found that nearly 65% of fudge failures came from people not using the right thermometer or guessing the stage by eye.
Let’s be honest—guessing “well, it looks about right” is a fudge tragedy waiting to happen. Sugar chemistry is precise stuff. When you heat your sugar, milk, and butter mixture, you’re driving off water. Too little? The fudge can’t crystallize like it should and stays slumpy. Too much and you’ll have fudge that’s dry and crumbly, not decadent and creamy.
Tweaking ingredient ratios can also bite you back. A splash too much cream or a heavy hand with condensed milk leaves you with a soft fudge. Even adding a bit extra to make the fudge “creamier” is asking for trouble, because you wind up crossing the ideal sugar-to-liquid threshold. Classic recipes usually call for almost equal weights of sugar and dairy, and any off-balance sets you up for disappointment.
Here’s where a lot of people fall: timing the beating or mixing. The traditional hand-mixed fudge should not be disturbed until it cools to about 110°F, then it gets stirred like your life depends on it. Start sooner, and large sugar crystals form, making it sandy and not smooth—later, and you lose the window to get the fudge smooth and glossy (which also helps it set firmly!)
Last oddball reason? No one talks about the impact of weather until it strikes. High humidity slows evaporation, making it tricky for fudge to reach the right consistency. Professional candy makers sometimes run dehumidifiers in the kitchen on muggy days! So, if you’ve made flawless fudge last winter and are failing in July, peek at the humidity.

Testing, Fixing, and Preventing Soft Fudge
If your fudge isn’t hardening, good news: you might still save this batch and make sure future ones land perfectly. Here are some hands-on steps to diagnose and fix your fudge—plus how to sidestep these fails next time.
- First, check the sugar syrup temp with a candy thermometer. If you didn’t use one, buy a decent thermometer (they’re cheap, and they save so much frustration). That soft-ball stage window really matters: 234°F to 238°F is your golden ticket.
- If your fudge is still soupy after cooling to room temp (about 2-3 hours on the counter), all is not lost. Scrape it back into a saucepan and gently reheat. Bring it back up to soft-ball stage, checking the temperature this time. Don’t stir until it cools again, then beat it until it thickens and loses its shine before pouring it into the pan to set.
- If you’ve gone overboard on liquid, you can sometimes “dry out” the fudge by chilling it longer in the fridge or freezer, but this is a band-aid, not a fix. For future batches, follow ingredient measurements precisely. Kitchen scales are a fudge lover’s best friend for this reason.
- If you live somewhere notably humid, try making fudge on a clear, dry day, or run the AC or a dehumidifier in your kitchen while you’re making candy. Excess moisture in the air messes with sugar crystallization, which is why classic fudge is winter holiday fare: cold, dry days are fudge-friendly.
- If you’re making microwave fudge or using substitutions, accept that you might have to tweak and test several times before perfecting your "hack" recipe. Faster isn’t always firmer when it comes to fudge.
| Issue | Likely Cause | Fix |
|---|---|---|
| Too soft, won't set | Undercooked syrup, too much liquid | Reheat to 234°F-238°F, stir/beat as recipe directs |
| Crumbly, too hard | Overcooked syrup, too little liquid | Add small amount cream, gently melt/rebeat |
| Grainy texture | Disturbed too soon, underbeaten | Beat at right temp until thick and matte |
| Sticky/gummy fudge | Humidity, wrong sugar, or low temp | Adjust recipe, kitchen environment; use thermometer |
Love data? In one 2022 baking study, using a thermometer improved fudge success rates by 88%. Think of it like this: fudge is kitchen science in sweet disguise. That thermometer earns its keep in the drawer, and knowing your mixing window by feel (or with a quick temp check) gives you pro-level confidence, no matter your skill.
Another hands-on trick: Do the soft-ball test if you don’t have a thermometer. Drip a little syrup into cold water—if it forms a soft ball you can squish with your fingers, you’re good. If it dissolves or stays gooey, it’s not there yet. Is this messy? Sure. Does it work? Old-school bakers swear by it when gadgets fail.
Still have stubborn fudge? Make “fudge pops” by scooping and freezing it, or swirl into brownies or ice cream. Waste not, right?
Insider Tips for Foolproof Fudge Every Time
No one enjoys the heartbreak of a failed homemade fudge batch—especially not after spending time and expensive ingredients on it. So, what do real fudge masters do differently? These simple habits can make the difference between squishy disaster and brag-worthy fudge that finally hardens just right.
- Measure every ingredient precisely. This means leveling spoons, weighing sugar, and being exact with liquid. Fudge recipes aren’t suggestions—they’re more like edible instruction manuals.
- Keep a homemade fudge diary or a notes app. Jot down which day you made it, how humid or dry it was, what brand of dairy or chocolate you used, and the syrup temp. Patterns and tweaks reveal themselves after a few rounds, and you’ll know what works in your kitchen climate.
- Always let the syrup reach an undisturbed rolling boil before you start timing or temp checking. Soft simmering isn’t enough to drive off the right amount of water.
- Use a heavy-bottomed pan—this stops hot spots and scorching. If you see a crusty ring on the side, don’t scrape it in; it’s usually crystallized sugar, and you want your fudge smooth as silk.
- Let the cooked syrup cool without stirring, then beat it vigorously once the temp falls to 110°F. This old-fashioned "wait, then mix" ritual isn’t just tradition—it’s science. It encourages micro-crystals, which make for creamy, sliceable fudge that holds its shape at room temp.
- If you’re using add-ins (nuts, marshmallows, etc.), fold them in only at the very last moment, after beating—never before, or you risk messing up the texture.
- Don’t rush cooling. Fudge needs 2-3 hours on the counter, then a couple hours more in the fridge, before you slice into it. Cutting too soon is tempting fate (and cleaning up fudge lava off your knife).
- Store finished fudge in an airtight container, ideally with parchment or wax paper between layers, to prevent sogginess and keep it from absorbing fridge odors.
A few quick-fire myths to bust: more butter does NOT make for firmer fudge; chocolate chips can play well, but too many can up your goo-factor; and you can’t save rock-hard fudge by adding water (at least, not without screwing up the flavor entirely). The best fudge memories seem to come from people who measure, wait, and don’t cut corners.
If you’re feeling brave, recipe tinkerers sometimes swap white sugar for brown, try coconut milk, or use vegan butter—with wildly different results. These experiments are fun, but start with the basics and master the texture first.
Oh, and keep these numbers handy: Soft-ball stage is 234°F to 238°F. Beating temp is around 110°F. Your patience is paid back in glossy, velvety fudge that holds its shape even on a sunny day. And hey, if you do mess up—slather the gooey stuff over vanilla ice cream and call it "fudge ripple swirl." No one will complain.