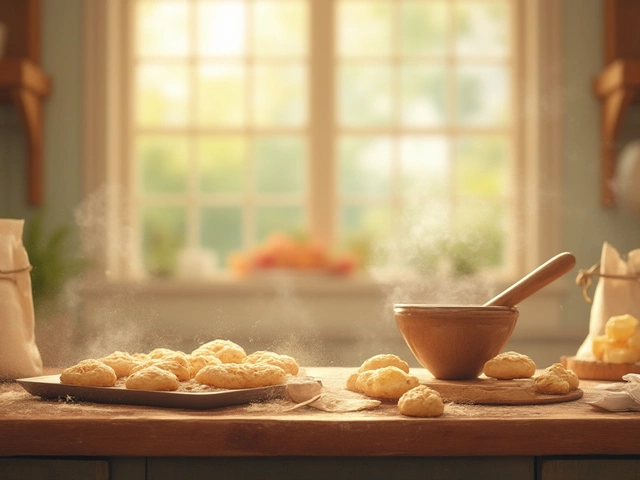
If you’ve ever baked cookies and ended up with dry lumps, flat pancakes, or burned edges, you’re definitely not alone. Even people who bake all the time run into these problems. There are a few simple rules that help you dodge all those kitchen disappointments. Forget fancy tricks—the real game-changers are surprisingly basic.
Every step matters when it comes to homemade cookies. The right ingredients, a good mix, and paying attention to timing all make a difference. It’s not just about following any recipe. It’s about knowing what actually works. Sometimes, it comes down to something as silly as the temperature of your butter or mixing the dough just a little too much. Most failed batches can be traced back to a tiny detail that got missed along the way.
Once you learn the main guidelines, it’s way easier to get that perfect chewy center or crispy edge—whatever you’re going for. No fancy gadgets needed. Just a few habits that make all the difference, batch after batch.
- Get Your Ingredients Right
- Master the Mixing
- Perfect the Bake Time
- Troubleshooting Common Cookie Problems
- Storage and Freshness Tips
Get Your Ingredients Right
If you start with the wrong stuff, no amount of baking magic will fix your cookies. Picking fresh and quality ingredients makes a big difference, especially for things like butter, flour, and eggs. Use room temperature butter unless your recipe says otherwise—straight-from-the-fridge butter doesn't cream well, and melted butter can ruin the texture. For eggs, room temperature helps everything blend smoothly. Fun fact: Room temp eggs whip up about 20% more volume, so they're a hidden power-up for your dough.
Measurement matters way more than you think. A little too much flour and your cookies turn out dry or crumbly. Too little, and they’ll spread into one giant cookie mess. Always spoon your flour into a measuring cup—don’t pack it down. Level it off with a knife for accuracy. And if you really want to be precise, a basic kitchen scale fixes a lot of classic cookie fails.
- Use pure vanilla extract, not imitation. It actually brings more flavor, and you can taste the difference.
- Check your baking soda and baking powder expiration dates. Flat cookies? Old leaveners are usually the culprit.
- If your chocolate chips are chalky or smell weird, toss them. Fresh ones melt better and taste richer.
Check out just how much a little bad measuring can throw you off:
| Flour Added | Cookie Result |
|---|---|
| Too much (Over 140g per cup) | Dry, dense, little spread |
| Just right (120g per cup) | Chewy, holds shape |
| Too little (Under 100g per cup) | Flat, greasy, over-spreads |
Don’t forget, the big secret to spot-on cookie baking is all about the basics. Start with high-quality, correctly measured stuff, and you’re halfway to perfect cookies already.
Master the Mixing
This part trips up a lot of people, even if they know their way around a kitchen. Mixing your cookie dough is more than just tossing everything into a bowl and crossing your fingers. It actually makes or breaks your cookies. The more you understand what’s happening, the better your results will be.
The number one thing? Don’t overmix. Once you add flour to your wet ingredients, you want to mix just until combined. If you mix too much, the gluten in the flour gets overworked. That’s where cookies get tough or rubbery instead of soft and chewy.
- Cookie baking really benefits from the classic method: cream your butter and sugar together first. This isn’t just routine. Proper creaming (aim for 2-4 minutes if your butter is at room temp) helps trap air in the dough, giving you a lighter texture.
- Add eggs one at a time, mixing just until each one disappears. This keeps your dough smooth and prevents streaks.
- If you’re adding mix-ins (think chocolate chips or nuts), always fold them in last. That way, you don’t crush them or overwork the dough.
Marsha Barnes, an award-winning home baker, says it best:
“Mix smart, not hard. Cookie dough only needs enough mixing to bring things together—especially once the flour goes in. Going overboard never helped a single cookie.”
Want a cheat sheet? Here’s what expert bakers recommend for mixing times at each step:
| Mixing Step | Time Needed | Signs It’s Done |
|---|---|---|
| Creaming butter & sugar | 2-4 minutes | Fluffy, pale, no sugar grains |
| After adding eggs | 10-20 seconds per egg | Disappeared into dough |
| Mixing in flour | 20-30 seconds max | No dry flour, dough just comes together |
| Folding in extras | About 20 seconds | Chips/nuts spread evenly |
Don’t forget to scrape the sides and bottom of your bowl with a spatula as you go. It makes sure nothing’s left unmixed, and that every cookie turns out the same. Stick to these habits, and you’ll skip most common mistakes—and end up with way tastier cookies.

Perfect the Bake Time
Getting the bake time right is where many great cookie dreams go sideways. Too short? You get cookies that fall apart or taste raw. Too long? They turn into dental hazards. The trick is to rely more on your eyes and your oven instead of just the clock on your phone or kitchen wall.
Here’s the basics: most cookie recipes bake best between 350°F and 375°F. But ovens can be sneaky—sometimes running hotter or cooler than their setting. If you haven't used an oven thermometer before, now's the time. It’s the one tool that shows the real temperature inside, not just what your oven dial claims. Studies from the USDA found that regular home ovens can be off by 25°F or more. That's a game-changer for cookie baking and explains a lot of sad, undercooked centers or burned bottoms.
Watch for these classic cookie signs to know when they’re done:
- Edges are golden brown but the centers still look a bit soft (they’ll firm up as they cool).
- Cookies no longer look glossy or wet on top.
- The bottom lifts easily off the tray without sticking.
Here’s a quick chart with common cookie types and their typical bake times so you don’t have to guess every single time:
| Cookie Type | Oven Temp | Bake Time |
|---|---|---|
| Chocolate Chip | 350°F | 10–12 min |
| Sugar Cookies | 375°F | 8–10 min |
| Oatmeal Raisin | 350°F | 10–13 min |
| Peanut Butter | 350°F | 9–11 min |
Don’t trust your timer completely. Start checking your cookies a minute or two before the shortest time in the recipe. Turn the pan around halfway through if your oven has hot spots. If you like your cookies chewy, pull them out when they’re just set in the middle. For crispier cookies, give them another minute or two—but don’t walk away! They go from perfect to burnt way faster than you’d expect.
Small changes can make a huge difference. Keep these habits up and you’ll get the results you want, every time you bake.
Troubleshooting Common Cookie Problems
Even when you do everything right, cookies can throw you a curveball. Sometimes they spread way too much or barely budge. Other times, the texture just feels off. The good thing? Most of these issues have a fix that’s actually really straightforward. So, don’t panic if your first tray isn’t perfect—the next batch will be better.
Here are some quick fixes for the most common problems:
- Cookies Are Too Flat or Oily: Warm or melted butter makes dough spread more on the pan. Try chilling your dough for 30 minutes before baking. Double-check that you’re not using too much sugar or butter—spoon and level when measuring!
- Cookies Won’t Spread: This usually means there’s too much flour. Make sure you’re measuring it right—the spoon-and-level method works best instead of scooping straight from the bag.
- Overbaked or Burned Edges: Check your oven temp with an oven thermometer. Home ovens can be off by 10-20°F (even new ones). Rotate trays halfway through baking if your oven heats unevenly.
- Cookies Are Dry and Crumbly: Overmixing is usually the culprit. Mix just until the flour disappears. Too little fat or sugar can dry things out too, so watch those measurements.
- Cookies Are Too Doughy or Undercooked in the Middle: Maybe they’re too thick, or your oven is too hot. Lower the temp by 10 degrees and bake a little longer. Remember, cookies finish setting as they cool.
Baking at home is a balancing act. Want a simple chart for quick fixes? Here’s a handy comparison of common causes and solutions:
| Problem | Likely Cause | Easy Fix |
|---|---|---|
| Too flat/spreads too much | Warm butter, not enough flour | Chill dough, spoon-and-level flour |
| Doesn’t spread at all | Too much flour, not enough sugar/fat | Reduce flour, check sugar and butter |
| Burned edges | Oven too hot, thin baking tray | Use oven thermometer, rotate tray |
| Dry & crumbly | Overmixing, not enough sugar/fat | Mix less, double-check fat and sugar |
| Undercooked in center | Oven too hot, pan too thick/thin | Lower temp, bake longer |
Here’s one more tip: cleaning your baking trays in between batches can actually help. Old crumbs or burned spots on a tray will mess with the next batch’s flavor and texture. And if you’re baking multiple trays at once, swap the racks halfway through. This helps cookies bake more evenly.
So next time your cookie baking session goes sideways, check this list. Almost any fail can be fixed with a small tweak or two—and honestly, a slightly broken cookie still tastes pretty darn good.

Storage and Freshness Tips
Want soft, tasty cookies days after baking? It comes down to a few simple moves. If you just leave them on the counter uncovered, most will go stale overnight. Sure, they might still taste sweet, but the texture’s a letdown.
First thing: make sure your cookies are totally cool before storing them. Warm cookies in a container trap steam, and that’s a recipe for soggy treats. For regular soft or chewy cookies, use an airtight container—something with a really tight lid, not just a random box. Crispy cookies do better in a loosely covered container so they don’t turn limp with moisture.
Put wax paper or parchment between layers if your batch is stacked, especially if your cookies are sticky or full of chocolate chips. Want cookies to stay extra fresh? Pop in a slice of bread. The bread gets hard, but your cookies soak up the moisture and stay soft. Weird trick, but it works every time.
Need to store your homemade cookies longer than a week? Freeze them. Most cookies freeze well, especially classics like sugar and chocolate chip. Cool them completely, then pack in resealable freezer bags. Get the air out—too much air means freezer burn. To thaw, just set them out at room temp in the closed bag until soft (usually less than an hour). You can even freeze cookie dough—shape into balls, flash freeze on a sheet, then toss the frozen balls in a bag. That way you get fresh-baked cookies any time, no mixing bowl needed.
| Type | Room Temp | Fridge | Freezer |
|---|---|---|---|
| Soft/chewy cookies | Up to 1 week | Up to 2 weeks | 2-3 months |
| Crispy cookies | Up to 1 week | Not recommended | 2-3 months |
| Cookie dough | N/A | 1 week | 2-3 months |
One last tip: Don’t mix different flavors together. Strong flavors (like peanut butter or mint) blend into plain sugar cookies and mess up the taste of your whole batch. Keeping everything separate keeps each type true to flavor.
That’s really it! Store your cookie baking creations the right way and they’ll taste bakery-fresh days later—no more dry, crumbled leftovers.